
In this article, you will learn how to create custom workflows from scratch to automate customer communication and repetitive tasks.
Automations act as a 24/7 virtual assistant that automatically handles routine tasks such as review requests, payment reminders, and follow-ups. By putting your busy work on autopilot, you can ensure your customers are always kept in the loop without any extra manual effort.
Building a New Custom Automation
In order to create a custom automation workflow, you will need to access your Add-on center.
1. Access Automations:
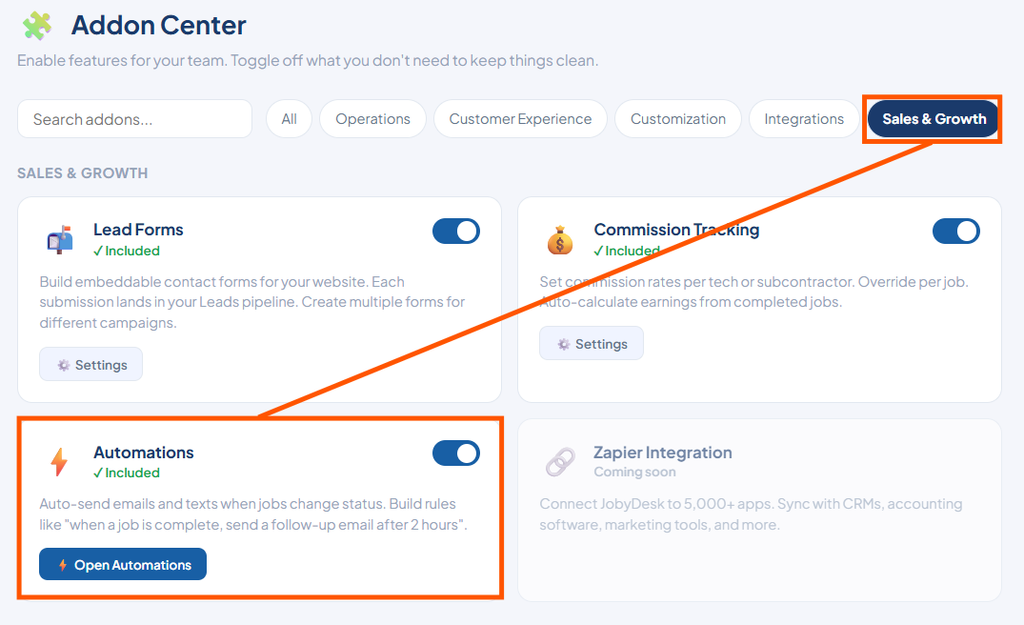
Click on Add-on center in the left sidebar. Select the Sales and Growth tab at the top, then click Open Automations on the Automations card.
2. Start a Custom Workflow:
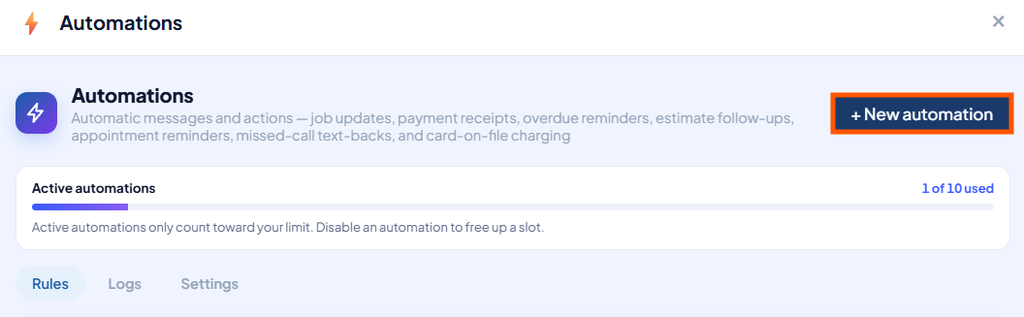
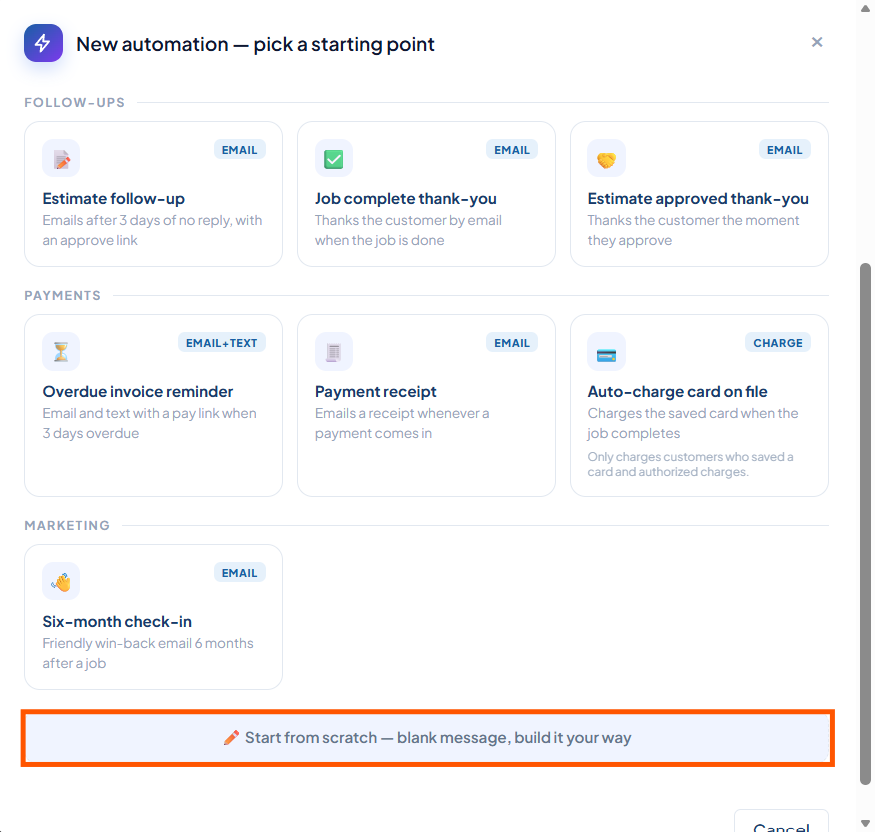
Click the + New Automation button in the top right. Scroll to the bottom of the template list and click Start from scratch.
3. Name Your Automation:
Enter a name for your automation in the provided field.
4. Set Trigger, Action, and Timing:
Configure the core logic of your automation:
- Select a trigger event under When (e.g., when a payment is received or a job changes status).
- Select an action under Then (e.g., send an email and text to the customer).
- Choose the timing to trigger immediately or set a delay in minutes, hours, days, or months.
6. Add Optional Conditions and Delivery Windows:
- Click + Only if to restrict the trigger using specific conditions.
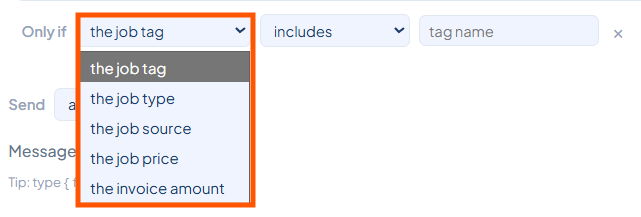
- Set the delivery timing to send messages anytime, or specify a strict delivery window (e.g., 8:00 AM to 8:00 PM).
7. Compose Your Message:
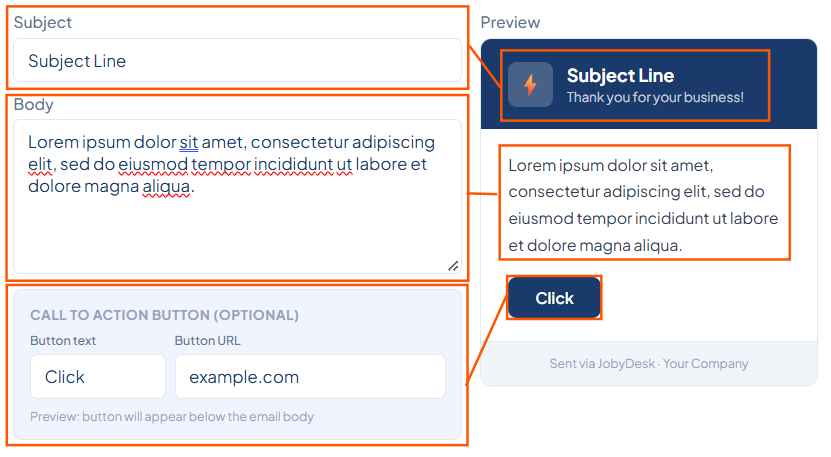
Type your email subject line and body text while viewing the live preview on the right.
- Click Insert variable to automatically include dynamic data, such as the customer’s name or your business phone number.
- Add a call-to-action button by entering the button text and your target URL.
8. Save and Activate:
Click Create to save and activate your automation workflow.
Note
You can customize your email branding (header colors and taglines) in the Settings tab. You can also track the status of all sent messages and review any potential errors using the Logs tab.
Once created, your new automation will appear active on your main Automations dashboard, where it can be toggled on or off at any time.