
In this article, you will learn how to build, customize, and send an estimate to a potential customer.
Providing a clear and professional estimate allows you to outline your proposed services, pitch optional add-ons, and secure a customer’s signature or deposit before you begin work. JobyDesk makes it easy to generate estimates and control exactly how your customers approve them.
Building a new estimate
To build a new proposal, you will need to access your workspace dashboard.
1. Start the estimate:
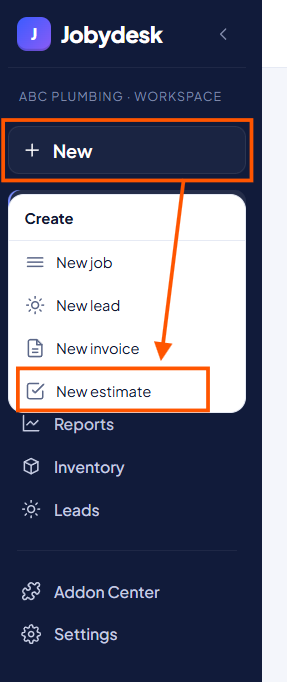
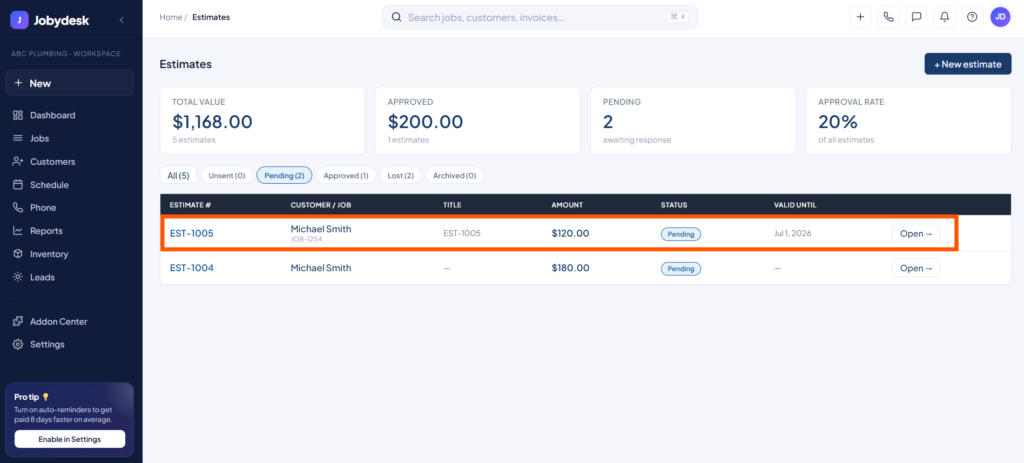
You can create a new estimate by clicking the + New button on your left-hand sidebar menu and selecting New estimate. Alternatively, navigate to your main Estimates dashboard and click the dark blue + New estimate button in the top right corner.
2. Enter the basic details:
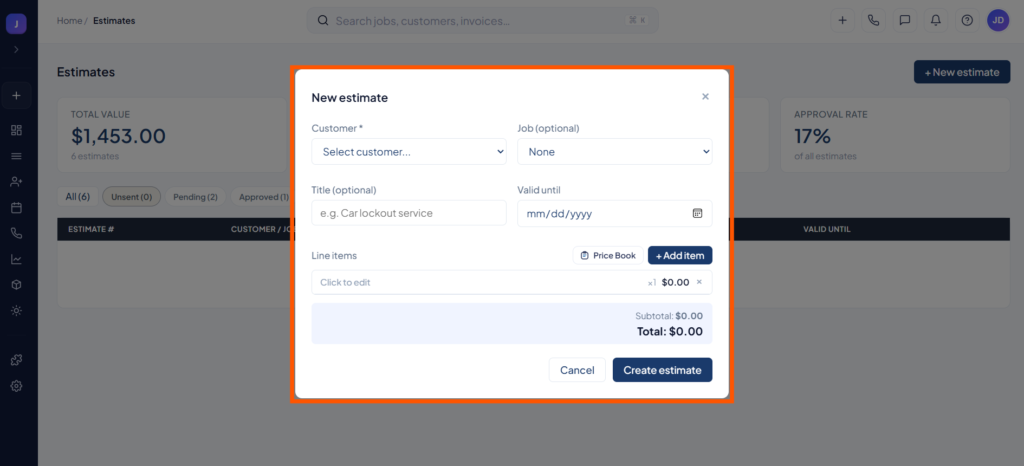
A setup window will appear where you can configure the foundational details of your proposal:
- Customer: Click the dropdown menu to search for and select an existing customer.
- Job (Optional): If this estimate is related to an existing job in your pipeline, link it directly from the dropdown to keep your records organized.
- Title: Give your estimate a clear, optional title that your customer will see (e.g., “Car lockout service”).
- Valid until: Click the date field to open the calendar picker and set a specific expiration date for your pricing.
3. Add your line items:
You have two ways to add services or products to the initial estimate:
- Price Book: Click the Price Book button to search your catalog and pull in pre-set items.
- Manual Entry: Click the + Add item button to create a custom entry. You can type the item name, set the quantity, and enter a custom price manually.
- After adding your initial items, click Create estimate to generate the full document draft.
4. Customize tiers and add-ons:
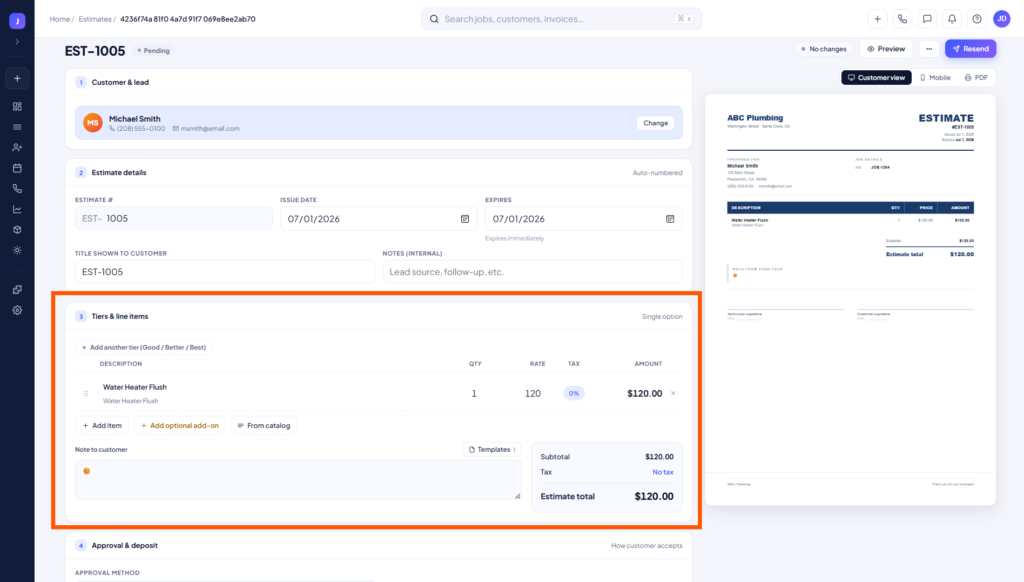
Once your draft is open, you can further customize the proposal. Under the “Tiers & line items” section, you can click + Add optional add-on to offer your customer additional choices that they can toggle on or off themselves before approving.
5. Configure approval and deposits:
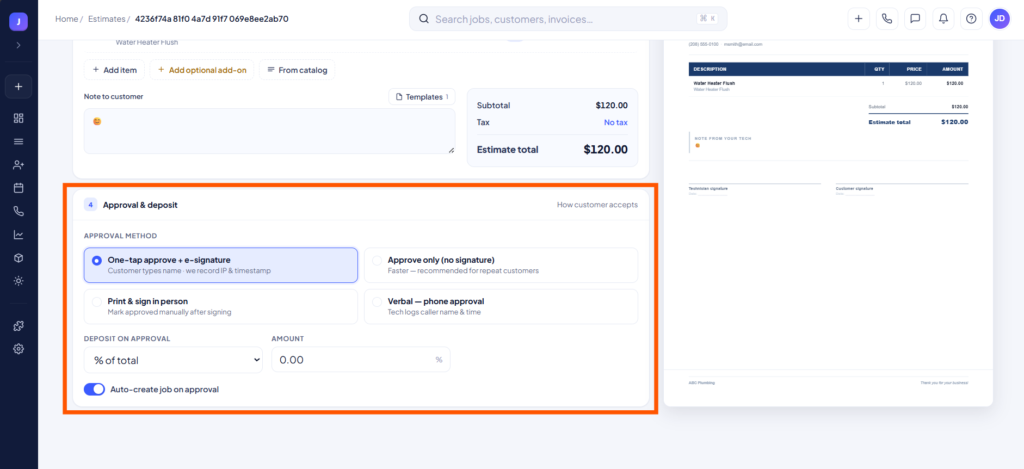
Scroll down to the Approval & deposit section to define how the customer accepts the proposal.
- Approval Method: Choose your preferred method, such as requiring a one-tap approve with an e-signature, an approval without a signature, a physical print-and-sign, or a verbal phone approval logged by your tech.
- Deposit on approval: You can require an upfront deposit to secure the work. Choose between a fixed amount, a percentage of the total, or no deposit.
- Auto-create job: Toggle on the Auto-create job on approval switch to have the system instantly generate a work order as soon as the customer accepts.
6. Send to the customer:
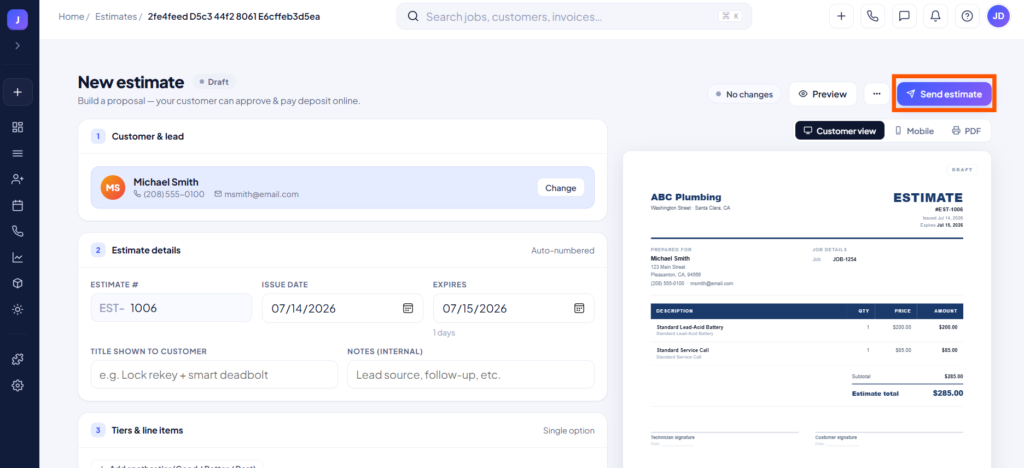
When your proposal is perfect, click the purple Send estimate button at the top of the screen. You can choose to deliver the secure link via Email, SMS, or both, and you can check a box to include a PDF copy of the document.
You can manage your saved estimates at any time. By opening an estimate and clicking the three dots (…) next to the preview button, you can quickly duplicate the proposal, save it as a reusable template, convert it straight into an invoice, or mark it as declined.